What is the Difference?
In order for the Caller to know which options are available in an Auto Attendant, an audio file is usually played. These audio files come in the form of Menu Prompts and Intro Greetings.
Intro Greeting
The Intro Greeting will play the selected audio without any interruptions from callers pressing keys on the dial pad menu.
This greeting plays only once before the Menu prompt is played.
Menu Prompt
The Menu Prompt functions similarly to the Intro Greeting with the exception that the Menu Prompt can be interrupted when the caller presses a key on their dial pad.
- If there is an Intro Greeting in use, the Menu Prompt will play after the Intro greeting.
- If the auto attendant repeats its greeting, the Menu Prompt will be played without the Intro Greeting.
Since the Intro Greeting are not repeated, it is recommended to If cause a Menu Prompt if only one message should be played.
Adding a Greeting/Prompt
Picking the Right Greeting
Depending on how you would like callers to interact with the auto attendant, you can pick between using an intro greeting, menu prompt, or a combination of both.
- If callers should hear an un-skippable message followed by a second message that they can skip, an Intro Greeting with an added Menu Prompt is a good idea.
- In this case, the intro greeting is usually treated like a notice/warning that plays before the menu prompt.
- Intro Greetings are commonly used like this for playing an un-skippable message that the call is being recorded. This can also be used for announcing an important date.
- The Menu Prompt is usually used in this way for listing out the dial pad's options.
- In this case, the intro greeting is usually treated like a notice/warning that plays before the menu prompt.
- If callers should only hear one, skippable message, using only a Menu Prompt is recommended.
- Using an Intro Greeting by itself is not recommended since it is not read when a user has the menu repeat the greeting.
Managing Audio
To get to the menu to manage the audio for the greetings, click on the  or
or  button (depending on which greeting you would like to use).
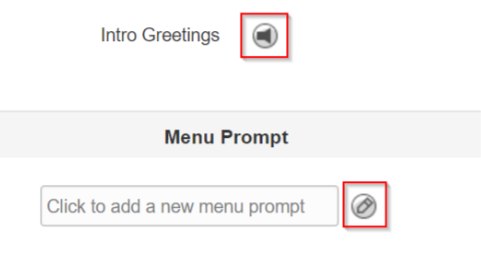
Doing so will pull up a menu for adding in audio. Depending on which greeting you select, the menu you see will look different.
- The Menu Prompt's Edit button will pull up a Manage Audio menu for only adding in audio.
- The Intro Greeting's Manage button will pull up a Manage Greetings menu that holds a section for adding a New Greeting and another section for selecting the Time Frame for that particular intro greeting to be played.
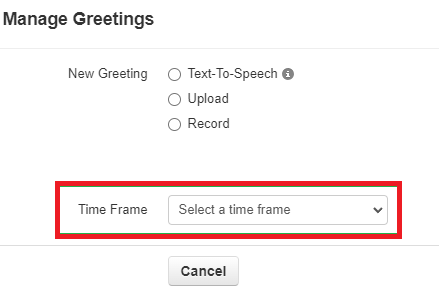
- After adding in an intro greeting, more greetings can be added for different time frames:

- After adding in an intro greeting, more greetings can be added for different time frames:
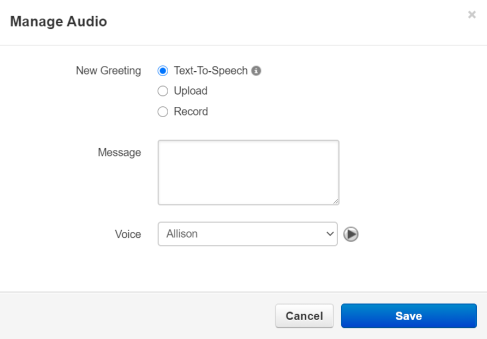
Text-To-Speech
This allows users to type a message that will be converted to an audio file using voice synthesis. 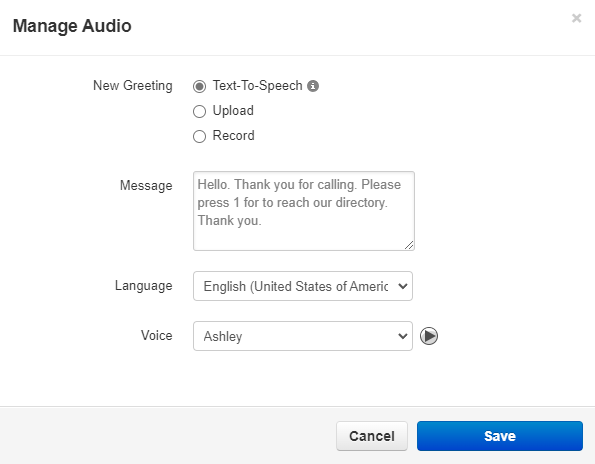
- The Language dropdown can be used to select the language for the message.
Quick Tip
It is highly suggested to have someone that speaks the selected language to check the message for any grammatical or pronunciation errors.
- The Voice option can be selected to determine how the text-to-speech will sound.
- The Play Button can be used to preview the audio file.
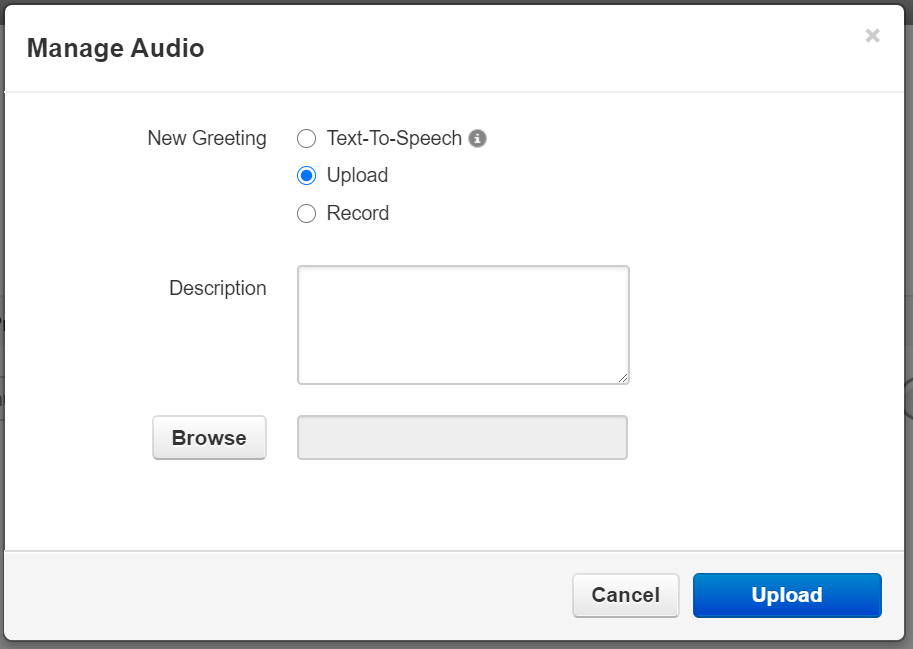
Upload
If you already have a message recorded
- Select the Upload option.
- In the Description field, type in a name for the audio file.
- Click Browse to select the correctly formatted audio file saved on your computer.
The audio file needs to be in a .WAV file, mono channel, and 8000 Hz format to be properly read in the phone system.
To convert your audio file, use this handy website:
G711.org - Telephony File Converter
When using this website to convert the file, select the “Standard Definition” option for the Output Format. - Select Upload to save it to the auto attendant.
- You will need to give a description to your uploaded audio file to use as a name.
Record
Instead of using Text-To-Speech or uploading a converted file, you can use the Record option to send a call to record the message through.
If you would like to record a message...
- Click the Record button.
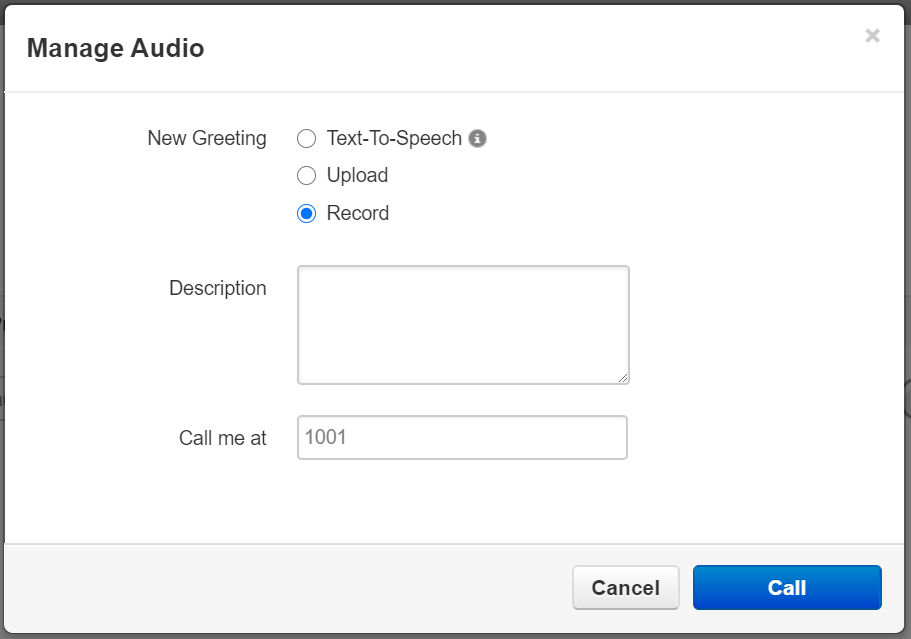
- In the Description field, type in a name for the audio file.
- In the Call me at field, type in the extension or a 10-digit phone number to send the call to.
- You will need to add a description to the greeting.
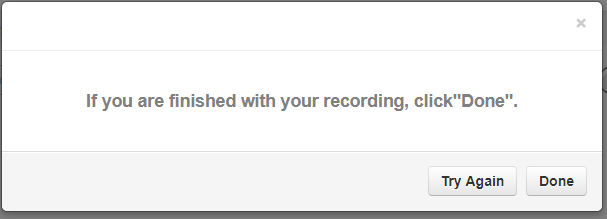
- When you are finished with the call you can either select Try Again to re-do the recording or select Done to upload the sound to the menu.