Manage Your Desktop App's Settings
General Settings
There a several Togglable settings under the General section of Settings.
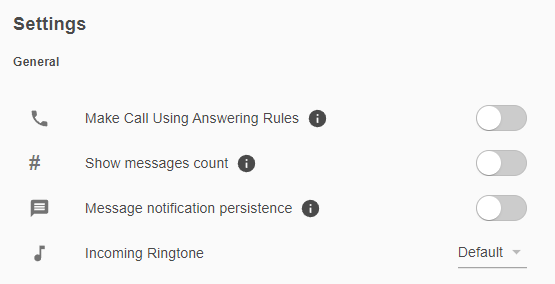
Make Call Using Answering Rules
When this option is enabled, your answering rules will be followed.
✔ This will alert all devices connected to your user.
Show Message Count
When this option is enabled, the app will show your total number of chat messages and texts.
Note: By default, the app will only show how many unread conversations there are.
Message Notification Persistence
When this setting is enabled, the new message/text notification will stay on screen until an action is performed.
Incoming Ringtone
Use the drop-down  to choose a different ringtone for your app.
HID Devices
An HID, or Human Interface Device, is a standard for computer devices that allows devices to be operated by humans without the assistance of extra software or drivers. Some models of headsets are HID-compliant and can be specially set up to work with the PrimeCall desktop app.
To set up an HID-compliant headset in the desktop app's General settings…
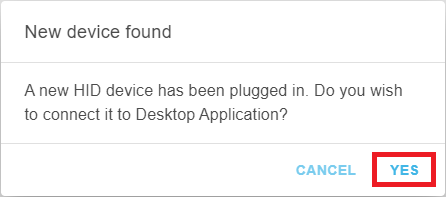
- Connect an HID-compliant headset to your PC.
- In the New device found notice that pops up, click YES.
- In the HID Devices section of the General Settings, click the CONNECT button.

- In the notice that appears, click the device's name and then the Connect button.
✔ The HID Devices section should update to show the HID-compliant device is paired.

You can also hover over the tab in the browser that the desktop app is using to see a notice that an HID device is connected:
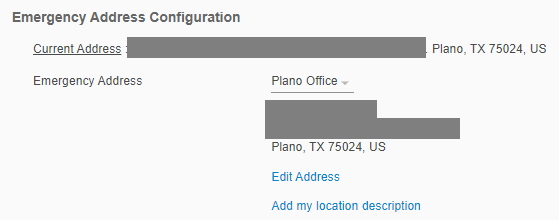
Emergency Address Configuration
If you use the desktop app at a different site or remotely from home, it is essential to update the address it uses for your Emergency Caller ID. Multiple addresses can be saved so that you can switch addresses when you use the app at different locations.
It is recommended to update or switch your emergency address when you…
- First install and open the app.
- Move locations/sites.
- Start working remotely from home.
Quick Tip: This Emergency Address and your Emergency Caller ID phone number are shown to dispatchers when you call 9-1-1 for any emergencies.
DANGER: Not adding in your apps' current address can result in issues and delays in getting emergency responders to your location!
Avoid this risk by keeping your emergency address information up-to-date.
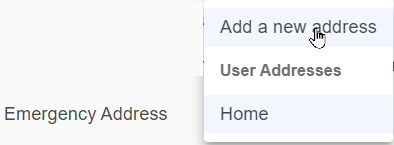
Add a New Address
- Click the Emergency Address drop-down and select Add a new address.
- In the boxes that appear, fill in the following information:
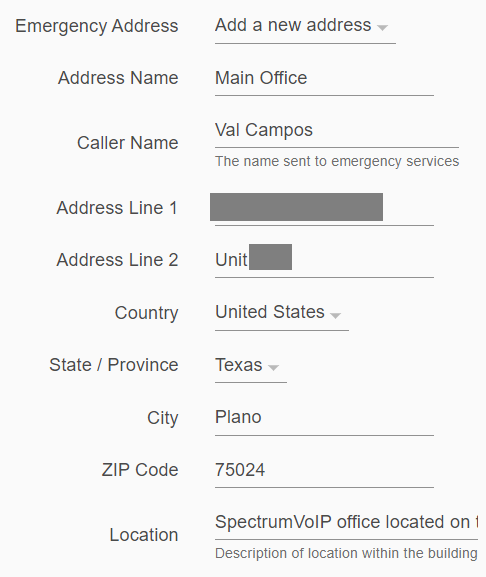
- Address Name - A unique, descriptive name for the address that will be seen in the Emergency Address drop-down when you select addresses for the app.
- Caller Name - Type in your first and last name that emergency responders should see when dispatchers answer your emergency call.
- Address Line 1 - Type in the street number and name where you are located.
- Address Line 2 - If necessary, type in the building, unit, or apartment number you are located at.
- Country - The United States is the only option available for provisioning for the app's emergency address.
NOTE: If you live in a different country, please contact our technical support team.
- State / Province - The state your office/home is located.
- City - The city your office/home is located.
- ZIP Code - Your office/home's ZIP code.
- Location - Type in a brief description of where exactly your office/home is located.
Note: This description can be up to 60 characters long.
Warning: If the location description is longer than 60 characters, you will receive an error when you validate the address in the next step.
- To confirm the address is correctly formatted, click the VALIDATE button.

✔ If all of the address' information is correct, you will see a notification that the address has been confirmed and applied.

- Click the SAVE button.

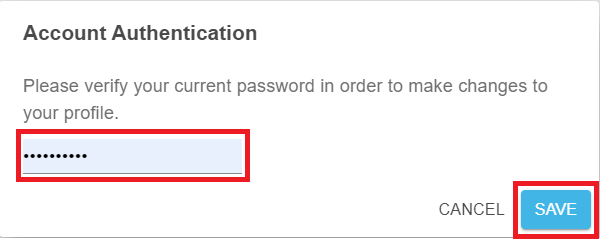
- In the Account Authentication window, type in your app's current password and click the SAVE button.
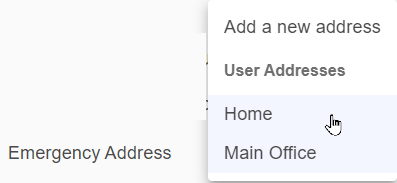
Switch Emergency Addresses
When you have multiple emergency addresses added, you can use the Emergency Address drop-down to select one of your address and click the SAVE button.

✔ It is recommended to re-select your emergency address when you…
- Move locations/sites.
- Start working remotely from home.
Edit an Address
At any time, your emergency addresses can be updated for accuracy,
To update the information for one of your emergency addresses…
- Use the Emergency Address drop-down to select the address that needs to be edited.
- Click Edit Address.

- Update the address and its information as needed.
- To confirm the address is correctly formatted, click the VALIDATE button.
✔ If all of the address' information is correct, you will see a notification that the address has been confirmed and applied.
- Click the SAVE button.
- In the Account Authentication window, type in your app's current password and click the SAVE button.
Update Address Name and Location
To only update the Address Name or the Location description…
- Click Add my location description.

- Update the Address Name and Location information as needed.

- Click the SAVE button.
- In the Account Authentication window, type in your app's current password and click the SAVE button.
Audio Settings
In the Audio tab of the Settings page, you can select which Microphones, Speakers, and Ringer devices for the desktop app to use. Click the check boxes to select which device you would like the app to use.
Microphones
In the Microphones section, you can select which audio device should be used when you handle calls.

If you want to check if your microphone is picking up audio correctly, you can view the blue box on the right to see the strength of your audio through your microphone.
Speakers
In the Speakers section, you can select which audio device should play the audio for your calls.

You can also click the Test button to make sure audio is playing through the selected speakers correctly. 
Ringers
If you would like to have the app ring through a different device, select that device in the Ringers section.

Similar to the Speakers section, you can click the Test button to make sure the ringtone is playing through the selected speakers correctly.
Advanced Settings
The Advanced tab allows you to enable and configure call popups in the desktop app.

✔ Call Popups are useful when a CRM is being used to access customer data. Call popups display that customer information automatically when a call is received.
Enable Call Popups
To enable call popups, click the Call Popup toggle. 
Set When a Call Popup will Display
There are two settings for call popups that can be adjusted to fine-tune when a popup will appear for calls: Call Popup on and Call Popup Delay.

Call Popup On
Call Popups can appear when either a call is ringing or answered. To select which state of the call the call popup should display for, use the Call Popup on drop-down.
Note: By default, call popups will appear when an incoming call is answered.
Call Popup Delay
If you prefer for the call popup to wait before displaying, use the Call Popup Delay box to type in how many seconds the app should wait before displaying the popup. 
Call URL
enter any Call URL followed by a variable that will be replaced with the inbound calling phone number. When an inbound call is received, this URL is sent to your preferred browser which will perform this search.
Commonly Used Call URLs
Note: By default, the system will use Google to search for any information.