What is a Queue?
When your business/organization experiences a large call volume, queues can help by distributing out calls to agents (known as destinations). Callers waiting in a queue will hear music on hold or ringing until a destination is available to take a call.
Note: Each destination is only sent one call at a time.
Create a Queue
To access your queues to create a new one…
- Log in to your Enswitch web portal.
- Navigate to Features → Queues.
- Click New.
✔ Doing so will pull up the New queue page where both the Queue settings and Exit queue when sections can be configured.
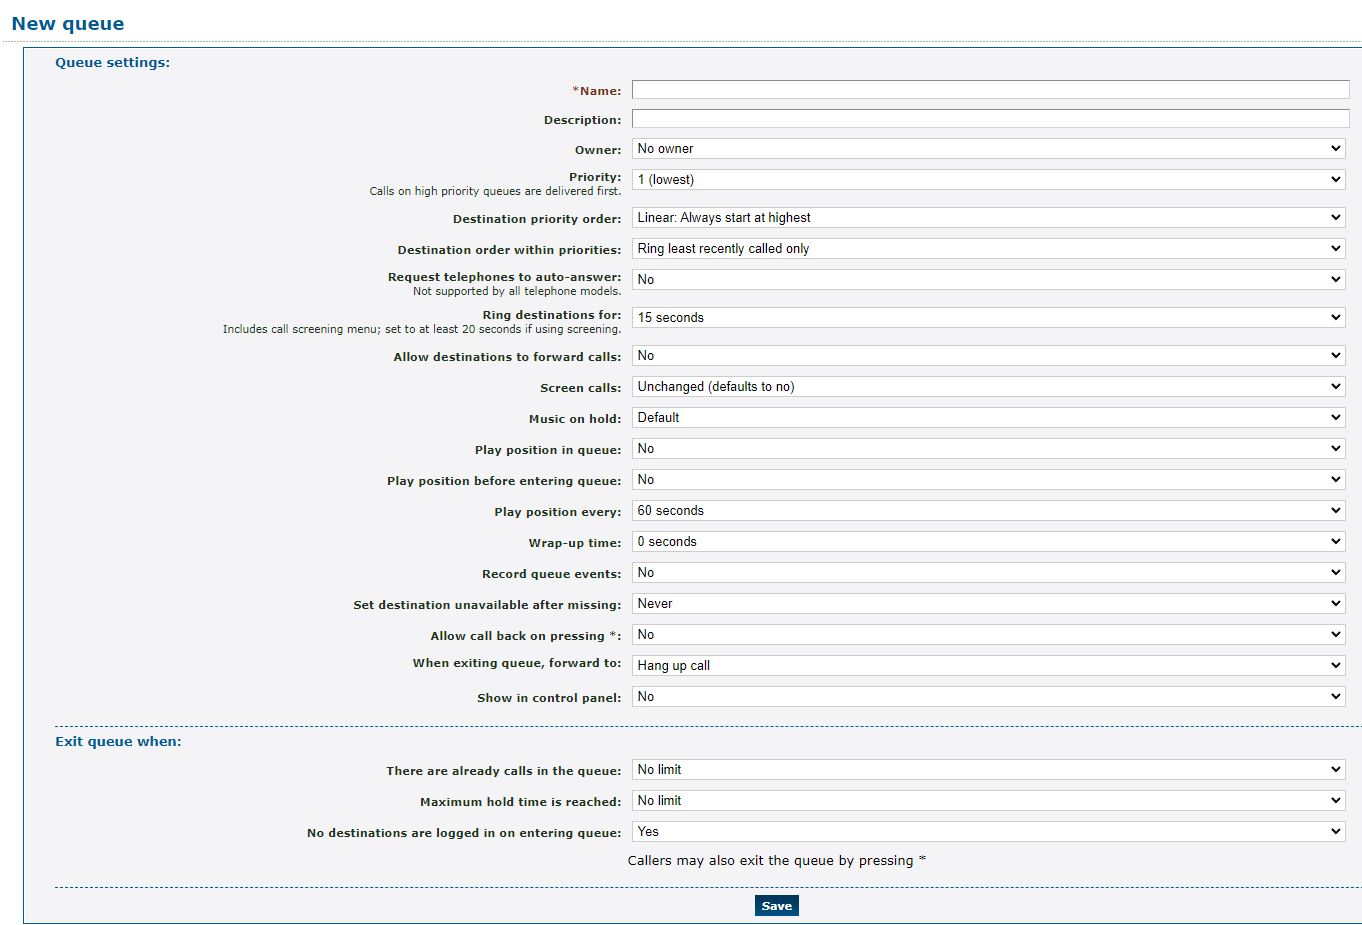
Queue Settings
To create a new queue, you will need to fill out the Queue settings section to begin configuring your queue.
To do this, fill out the following fields (fields marked with * are required):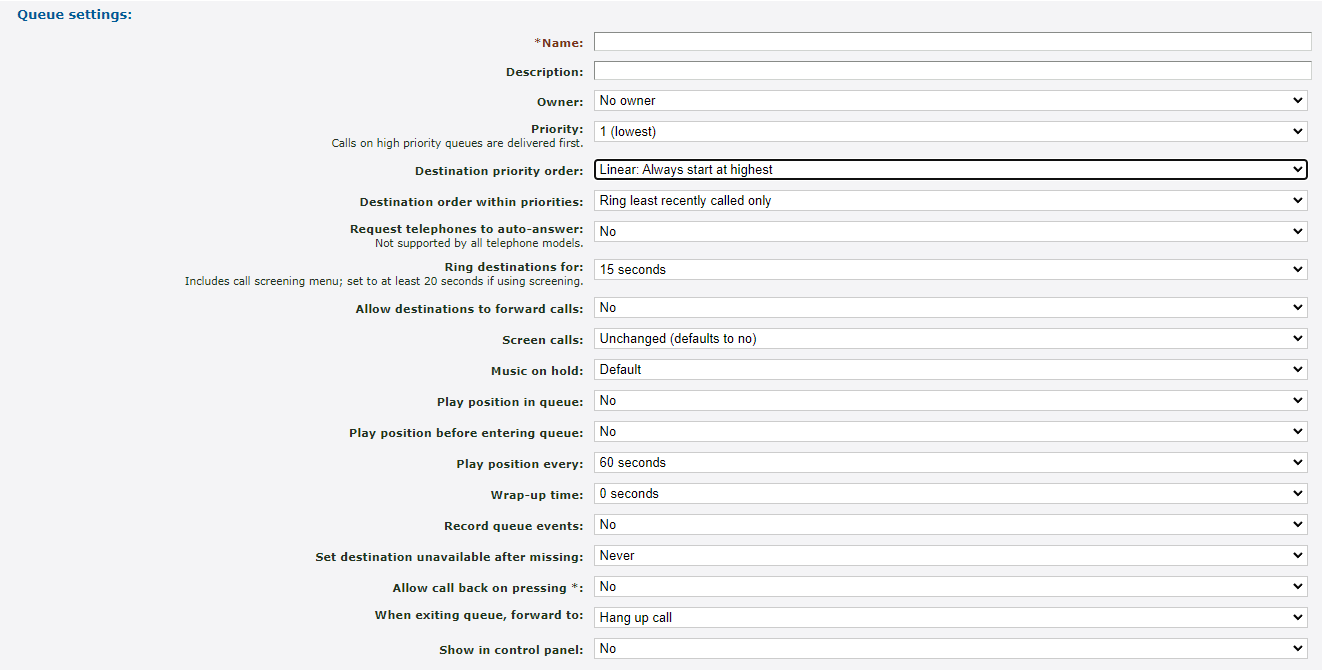
- * Name - A unique name for identifying the queue
- Description - A note that is displayed alongside the queue's name in the list of queues.
- Owner - Allows a user to edit the queue even if they are not an admin.
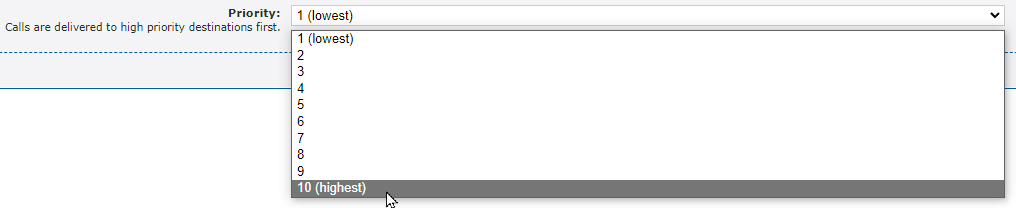
- Priority - Calls on high priority queues are delivered first. Calls to queues of the same priority are delivered on a first come, first serve basis.
- Destination priority order -
- Linear - The queue will ring agents with the highest level of priority.
- Smart linear - The queue will ring the last level that answered before ringing linearly.
- Circular - The queue will ring starting at the next level from the level that handled the previous call.
- Smart Circular - The queue will ring the last level that answered and then continue ringing circular.
- Destination order within priorities - Choose to either ring the next available line in a priority grouping or ring all available lines in a grouping at once.
- Request telephones to auto-answer - If necessary, you can enable the call to have the telephones of destinations auto-answer calls.
WARNING: This feature is not supported by all phone models.
- Ring destinations for - Select how many seconds a call will ring to each destination. When a destination does not answer, the call is returned to the queue to ring the next destination.
Note: If call screening will be enabled, set this time to at least 20 seconds.
- Allow destinations to forward calls - It is recommended to leave this set to no to avoid causing loops.
- Screen calls - Choose whether or not to screen calls.
✔ When set to yes, the destination will be asked if they will accept the call. This can help mitigate ghost and spam calls.
- Music on hold - Use this option to select if callers should hear music or ringing while waiting in the queue.
- Play position in queue - Select whether or not to have the queue tell the caller their position in the queue.
- Play position before entering queue - Select if the queue should tell callers their position in the queue before placing them in the queue to wait.
- Play position every - Select how often (in seconds) the queue will play the position of the caller while they wait in the queue.
- Wrap-up time - Select how long (in seconds) the queue should wait after a destination ends a call before sending a new call to them from the queue.
✔ This is useful for giving your agents time to finish any notes and other tasks to finish processing the previous call.
- Record queue events - Allows events in a queue to be recorded if queue statistics are enabled.
- Set destination unavailable after missing - Set how many calls a destination can miss before being set as unavailable in the queue.
✔ This can be useful when an agent steps away suddenly.
- Allow call back on pressing * - When enabled, callers will be asked if they want a call back when they press * to exit the queue.
- When exiting queue, forward to - Select a destination for callers to be forwarded to when agents are not available to take their call.
- Show in control panel - Choose whether or not to show this queue and its status in the Control panel page of the web portal.
Queue Exit Options
As a safeguard, settings that reference the When exiting queue, forward to option can be set up that can tell the queue how to handle calls that meet certain conditions.
Use these following fields to configure when callers will follow the queue's exit option:
- There are already calls in the queue - This acts as the maximum queue length. Choose how many callers can wait in the queue at a time.
✔ When additional calls try to enter the queue when it is full, the extra callers will be sent to the destination set in the When exiting queue, forward to option.
- Maximum hold time is reached - Set how long callers will be able to wait before the queue exits them out of the queue according to the When exiting queue, forward to option.
- No destinations are logged in or entering the queue - Decide if callers should follow the When exiting queue, forward to option when there are not any destinations logged in to the queue when a call is made to the queue.
✔ Once the queue has been configured, make sure to click Save.

Set a Message for Callers
Sometimes it may be necessary to have a message played for callers as they wait in the queue.

To add in a message, you can either…
- Select a sound file saved in the Sounds page (Features → Sounds) of the web portal.
- Upload a .wav file created from a recording or text-to-speech.
DANGER: To upload a .wav file, it is recommended to ensure the file has been converted to the proper format (.wav 8Khz, Mono, 16-Bit PCM).
If needed, please contact our technical support team to set up this message by calling 844.59PRIME (844.597-7463) or emailing support@primecall.com.
Uploading an incorrectly formatted audio file can result in unexpected, potentially catastrophic issues for your phone system.
Once a message has been added in, a new setting will appear in the Queue settings section: Play message to queued calls.
To have this message play to callers waiting, use the Play message to queued calls drop-down to select Yes.

Add a Destination to a Queue
Once the new queue has been saved, you can add in the destinations that callers will ring to. These destinations can be telephone lines and phone numbers.
To add a destination for the queue…
- Navigate to Features → Queues.
- Click the name of the queue.
- In the Destinations section, click Add a destination.
- On the New destination page, use the Destination drop-down to select if a Telephone line or Number will be the destination.

- If you selected Number, type the telephone number in the box.

WARNING: It is recommended to include the country code of the phone number to avoid any dialing issues.
- If you selected Telephone line, use the drop-down to select the line that will be rung.

- Use the Available for calls drop-down to select if the destination should immediately be available for calls.
- Use the Priority drop-down to select the priority of this destination.
- Click Save.

- If needed, click Add another destination to add more agents for the queue.