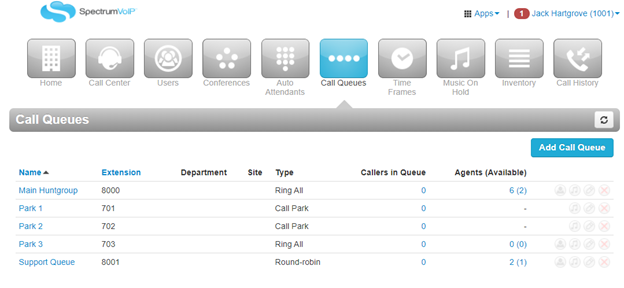
The Call Queues Page
All call queue tasks are performed from the Call Queues page. To display this page, click the Call Queues icon on the menu bar:
On the Call Queues page, you can create call queues, edit existing queues, and manage agents within queues.
Create a Call Queue
To create a new call queue for call routing:
- From the Call Queues page, click the Add Call Queue button.

Doing so will make the Add a Call Queue popup window appears, with the Basic tab displayed.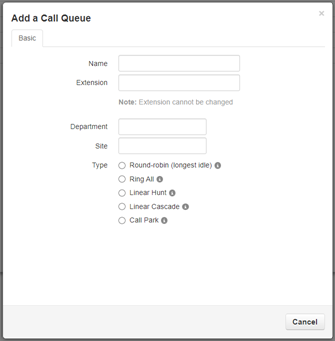
- Complete the fields in the Basic tab.
Basic Settings
- For Type…
- If you clicked Park, click Save to complete this procedure.
- Otherwise, click Next to display the Pre-Queue Options tab and proceed to the next step.
- Complete the fields in the Pre-Queue Options tab.
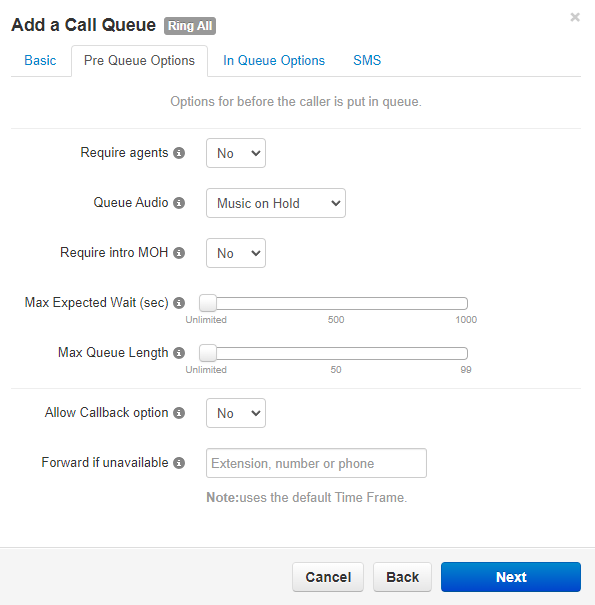
Pre-Queue Settings
- Click Next to proceed to the In-Queue Options.
- Complete the fields in the In-Queue Options tab.
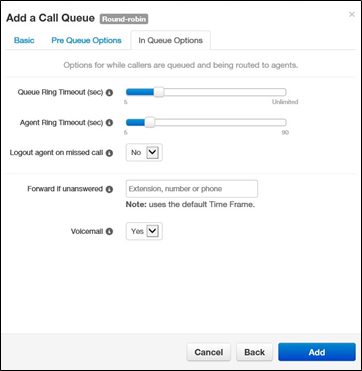
In-Queue Settings
- Click Add to apply these details.
Edit Call Queues
There may be times when you need to edit Call Queues to fine tune how callers should wait in the queue for an agent.
- From the Call Queues page, either:
- Click the name of the call queueneeding adjustment.
- Hover over a call queue, and then click the Edit Queue
 icon.
icon.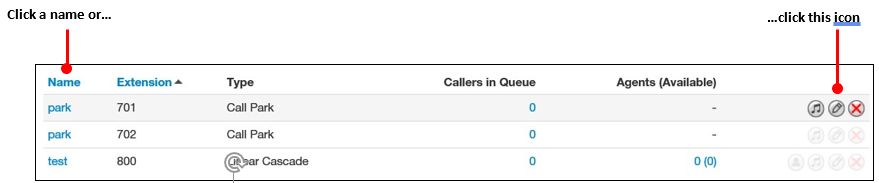
- Adjust the queue's Basic, Pre-Queue, and In-Queue settings as needed.
- Once the changes have been made, click Save.
Delete Call Queues
If you no longer need a call queue, you can delete it from the system.
To do so…
- Hover over the call queue and then click the Delete
 icon .
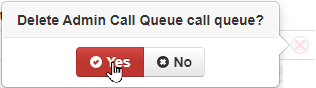
- On the confirmation prompt that appears, click either Yes to delete the queue or No to keep it.
Add Music on Hold to a Queue
Upload Music
The Call Queues page allows you to add Music on Hold for call queues.
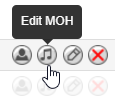
- From the Call Queues page, hover over the call queue, and then click the Edit MOH
 icon.
icon. 
- If needed, convert the audio file that will be uploaded to the system.
DANGER: The audio file needs to be in a .WAV file, mono channel, and 8000 Hz format to be properly read in the phone system.
To convert your audio file, use this handy website:
G711.org - Telephony File Converter
When using this website to convert the file, select the “Standard Definition” option for the Output Format. - Upload the audio file(s) from your computer using the Browse button.

- Name the song using the Song Name field.

- Once the audio file has been selected and named, click Upload.
Add a Message to Play Alongside Music
- Across from the call queue needing this change, click the Edit MOH icon.
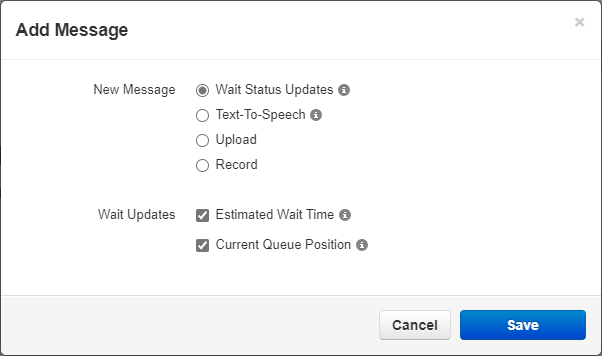
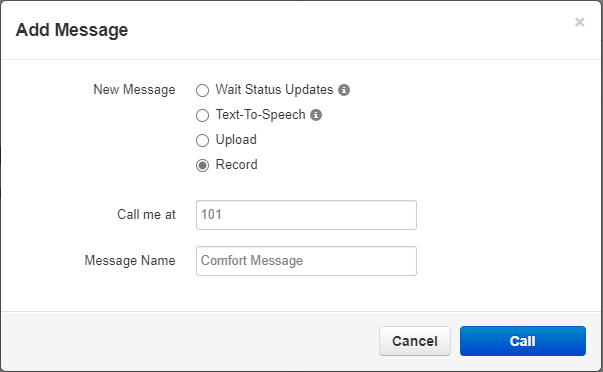
- To add a message to that queue, click the Add Message button.

- Using the Add Message modal, select from the following options:
- Wait Status Updates - Select if this message should let callers know their estimated wait time and/or their current queue position.
✔ A saved Wait Status Update message will appear in your list of messages:

- Text-To-Speech - Type up a message and then select a voice to read off the message using voice synthesis.
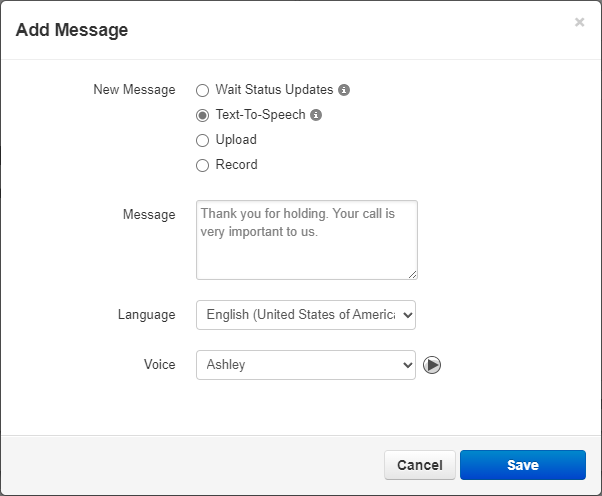
- After a message is typed up, the different voices can be tested by clicking the Play
 icon.
icon.
- After a message is typed up, the different voices can be tested by clicking the Play
- Upload - Click the Browse button and select a properly formatted audio file to upload into the system.
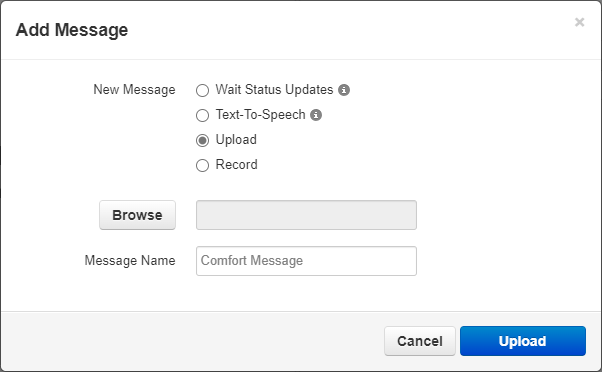
DANGER: The audio file needs to be in a .WAV file, mono channel, and 8000 Hz format to be properly read in the phone system.
To convert your audio file, use this handy website:
G711.org - Telephony File Converter
When using this website to convert the file, select the “Standard Definition” option for the Output Format. - Record - Use the Call to Record feature to send a call to an extension number or 10-digit phone number that will record what is said by the person answering the phone.
- Wait Status Updates - Select if this message should let callers know their estimated wait time and/or their current queue position.
- Repeat Steps 3 and 4 for each additional message you would like added.
Note: To learn more about adding and managing message for your call queues, read this article.
To learn about adding an Introduction message for your queue, read this article.
Manage Agents
The Call Queues page allows you to add, edit, and delete agents for call queues.
To view and edit the agents in a queue, navigate to the Call Queues page, hover over the call queue, and click the Edit Agents  icon.
icon.
Add an Agent
- Click the Add Agent button.
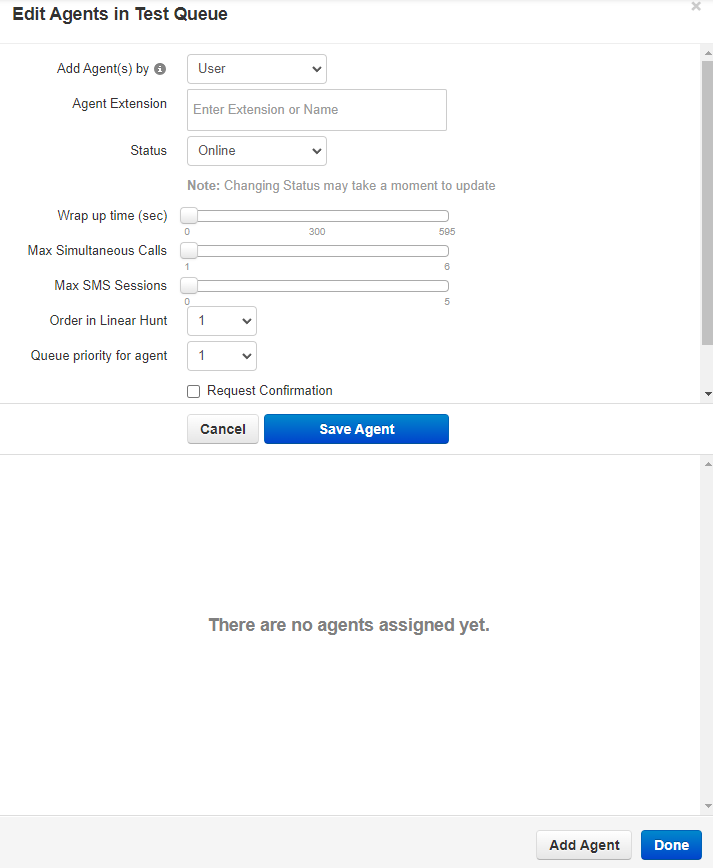
- Use the Add Agent(s) by drop-down to either add an agent by their User or by their specific phone.
- Add by User - Adding an agent by their User will ensure the call queue follows their answering rules.
- Forwards will be followed.
- The user's other devices will ring if set in a rule.
- Add by Phone - Adding an agent by their phone will have the call queue ignore their answering rules and ring just the device selected. Select more of the user's devices to ensure their other phones ring as well.
- Add by User - Adding an agent by their User will ensure the call queue follows their answering rules.
- In the Agent Extension box, type and select the name or extension number of the agent to be added.
- Type and select the names and extension numbers of other agents to be added.
- Use the Status drop-down to select whether the agent(s) will be immediately Online or Offline in the queue.
- Select the remaining settings for the agent(s).
Agent Settings
- When the agent is ready to be added, click Save Agent.
- Repeat this process for any additional agents.
- Once all agents have been added, click Done.
Edit an Agent
While viewing a queue's agents, you can edit the settings of an agent. To do so…
- Hover over an agent and click the Edit Agent
 icon.
icon. - Edit the Settings for the agents as needed.
Agent Settings
- Click the Save Agent button when adjustments are complete.
Remove an Agent
If you have an agent that is no longer needed in a call queue, you can easily remove them. To do so…
- Hover over an agent, and then click the Remove Agent
 icon.
icon. - When a confirmation prompt appears, click Yes to delete the agent or No to retain the agent.
- Repeat this process for additional agents needing to be removed.
- Click the Done button.
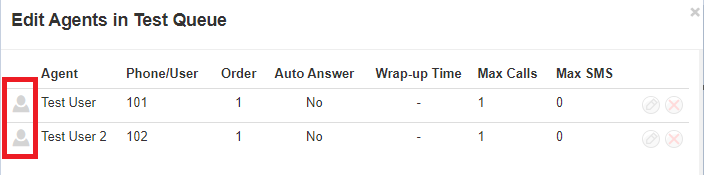
Convert Agents
To easily switch how your agents are added to the queue, you can click the Convert Agents button.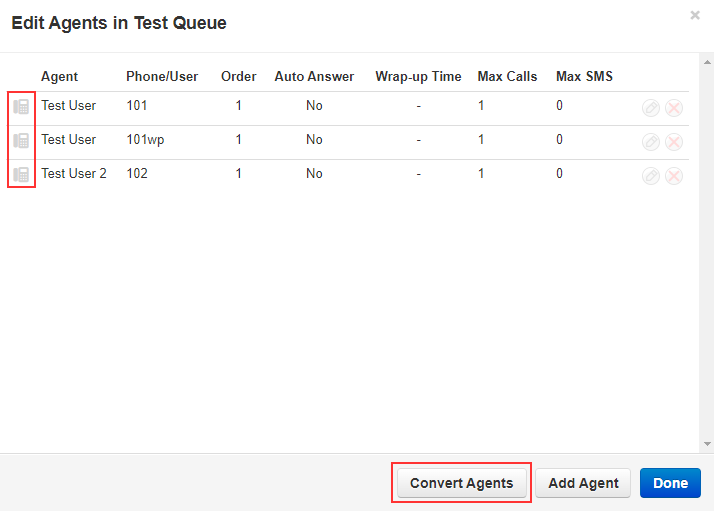
Doing so will switch how the agents are added. Agents added by phone will convert to added by user and vice versa.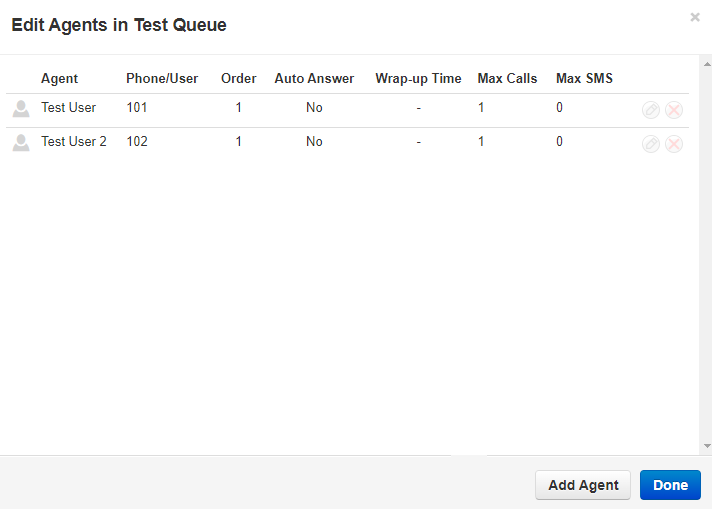
You will notice that in the images above, after converting the agents to 'users' from 'phones', the system removed the web phone (101wp) since 101 will simultaneously ring their web phone now.
NOTE: If you are having issues converting the phones to users, check to make sure the phones that are not converting do not have “#NAME” in their user information as it will not work. You will need to update that user's profile and replace “#NAME” with anything you want without special characters.
Check an Agent's Status
The color-coded status (person icon) will change color depending on the User's status:
- Green = Available
- Gray = Offline
- Red = Busy on a call
If an agent is showing as Offline but should be Online, or vice versa…
- Click the Edit Agent icon.
- Use the Status drop-down to select the agent's status.

- Click the Save Agent button.
- If needed, repeat this process for any other agents.
- Click the Done button.