Scope: Office Managers and Site Managers will be able to adjust the Answering Rules and Time Frames for their organization and all users.
Basic Users can adjust their own Answering Rules and Time Frames.
Set Up Your Inbound Call Routing
Using the Primecall web portal, call routing and forwarding can be set up using Time Frames and Answering Rules. This routing/forwarding could be for your business hours, holidays, lunches, and much more!
Create a Time Frame
In order for the system to know what dates and times calls should be routed to different destinations, a time frame will need to be created.
To add a new Time Frame…
- Navigate to the Time Frames page.

- Click on the name of your business (Domain Name) to pull up a list of the time frames for the whole business.

Quick Tip: Alternatively, you can search for and click on the name of a User that needs this routing just for themself.
- Click the Add Time Frame button to create a new holiday time frame.

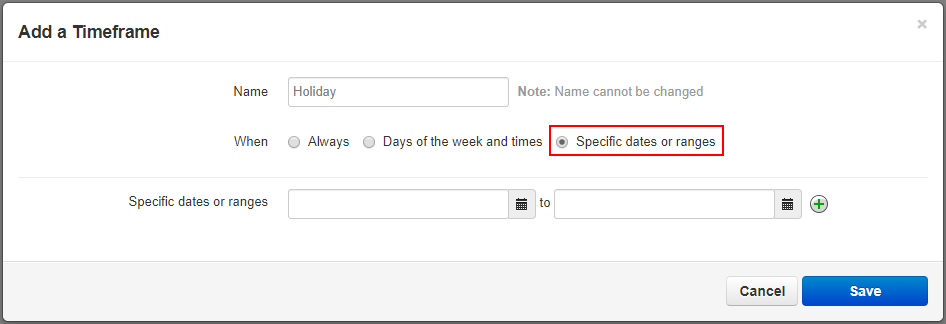
- In the Add a Timeframe menu, fill in the following information:
- Name - Type in a unique name for this time frame, such as Holidays, Temporary Forward, Meeting, Lunch, etc.

- When - Select Specific dates or ranges to schedule your holiday times in advance.
- Always - This option will set the time frame to be active until its deactivated.
- Rules that use Always time frames can be Enabled or Disabled manually in the Answering Rules of the users that use that rule.
- Days of the week and times - This option will set routing on a weekly schedule.
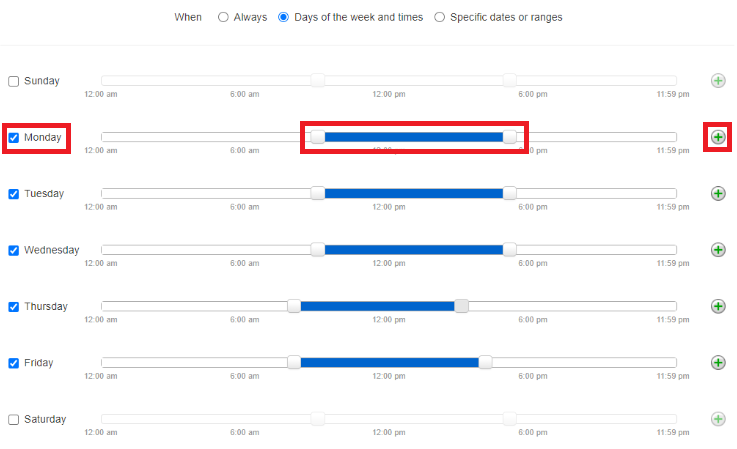
- Use the checkboxes to enable specific days of the week.
- Use the sliders to adjust start and end times.
- Click the Add Range
 button to add a split in the middle of the day.
- Specific dates or ranges - Click the boxes or Calendar icons to select the starting date and time and the ending date and time that the time frame will be active.

- Click a date on the calendar to select that day as part of the time the time frame will be active.
- Use the sliders to select the time for the starting and ending day of the range.
- To schedule more dates, click the Add date range button.
- To remove a date range, click the Delete
 button.
 - After saving the time frame, you may see that your date ranges appear differently. The system will split date ranges into partial and full days, but the ranges will be the same as what you set them.
- Always - This option will set the time frame to be active until its deactivated.
- Name - Type in a unique name for this time frame, such as Holidays, Temporary Forward, Meeting, Lunch, etc.
- Click the Save button.

- Specific Dates or Ranges - This option will set routing for specific date ranges.
- Click on the calendar icons to select specific dates and times for when the time frame with start and when the time frame will end.
- Multiple date ranges can be added by clicking on the Green Plus button.
- Date ranges can be deleted after they have been created by clicking on the Red X.
- After saving, if you go back to view the date ranges, you may see that your date ranges appear differently. The system will split date ranges into partial and full days, but the ranges will be the same as what you set them.
- Specific Dates or Ranges - This option will set routing for specific date ranges.
Check Your Phone Number's Routing
In order to know where we need to add the routing we will create; we need to confirm where your phone number is routing calls.
To check the Destination for calls to your phone number…
- Navigate to the Inventory → Phone Numbers.

✔ On this tab, you can check where your phone numbers route.
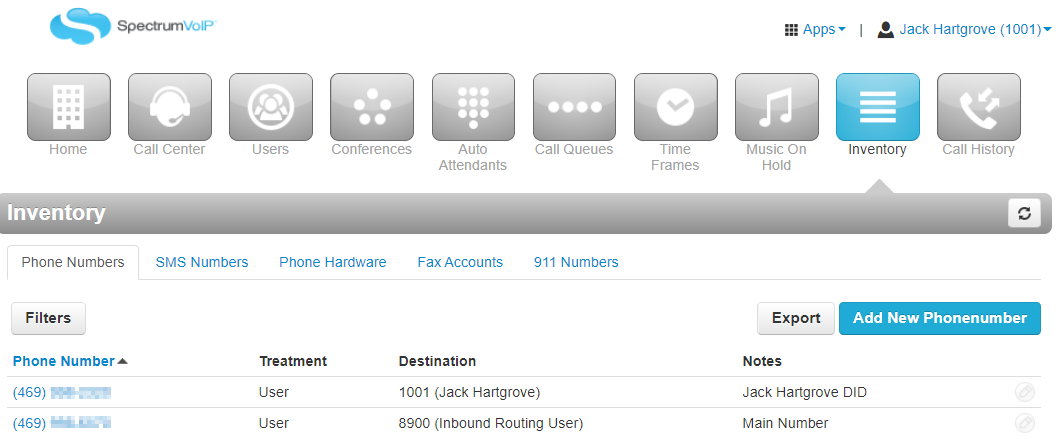
- Click the phone number that needs to be edited.
Quick Tip: Alternatively, click the Edit icon next to a phone number.
- In the Edit modal, check and update the following information:
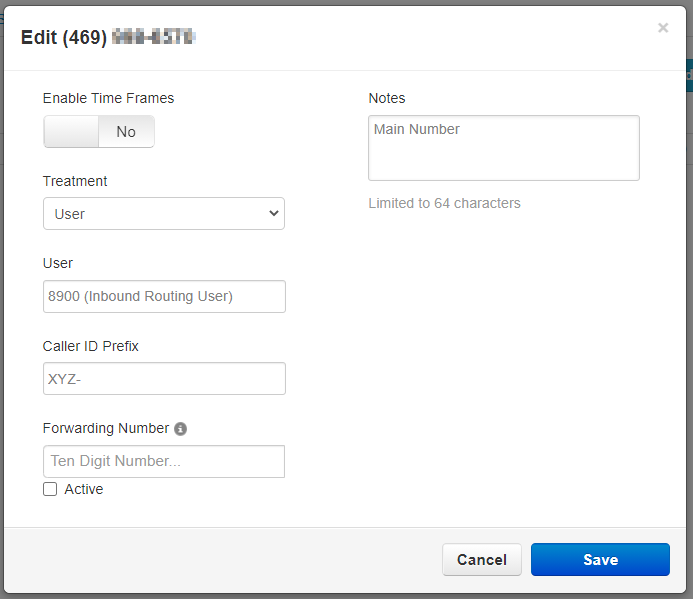
- Treatment - This will determine the type of destination we want callers to be routed when someone dials the phone number.
- Available number - Leave the phone number unassigned.
- User - Route the call to a specific user.
- Direct Dial Numbers (DIDs) can be routed to specific Users.
- "Main Numbers" will usually be routed to an Inbound Routing User (x8900) that uses Answering Rules and Time Frames to route calls depending on the time and day.
- Fax - Routes calls and fax messages to a fax number. Not all accounts will have this option.
- Conference - Routes callers to a conference bridge that has been created.
- Call queue - Routes callers directly to a call queue.
- Voicemail - Routes callers to a specific user's voicemailbox.
- PSTN - Routes calls to an off-net, 10-digit phone number, such as an Answering Service or a cellphone.
- Caller ID Prefix - This will add text to the beginning of the caller id name for all calls that route through this phone number.
- Notes - This is where you can add information about the use of the phone number, such a location or business name.
- Forwarding Number - In the case of a catastrophic event on our (PrimecallVoIP's) network, numbers can be forwarded to this fallback number. Other call forward options are available if you are experiencing a local network or power issue.
- Treatment - This will determine the type of destination we want callers to be routed when someone dials the phone number.
NOTE: We will NOT be utilizing the Enable Time Frames Option.
We will be utilizing Routing Users and their Answering Rules to handle time routing.
- You may already have a Routing User on your account (typically user 8900).
- If a Routing User is not on your account, or if you need a new routing user, please contact Technical Support.
Create an Answering Rule
Now that we have a time frame and know where calls for your phone number are being routed, we can add in an Answering Rule that will route calls according to the time of day.
To create an Answering Rule…
- To view your main business routing, navigate to the Users page.
- Use the search bar to find the user (Inbound Routing User, Call Queue, Auto Attendant, User, etc.) that handles calls from your phone number
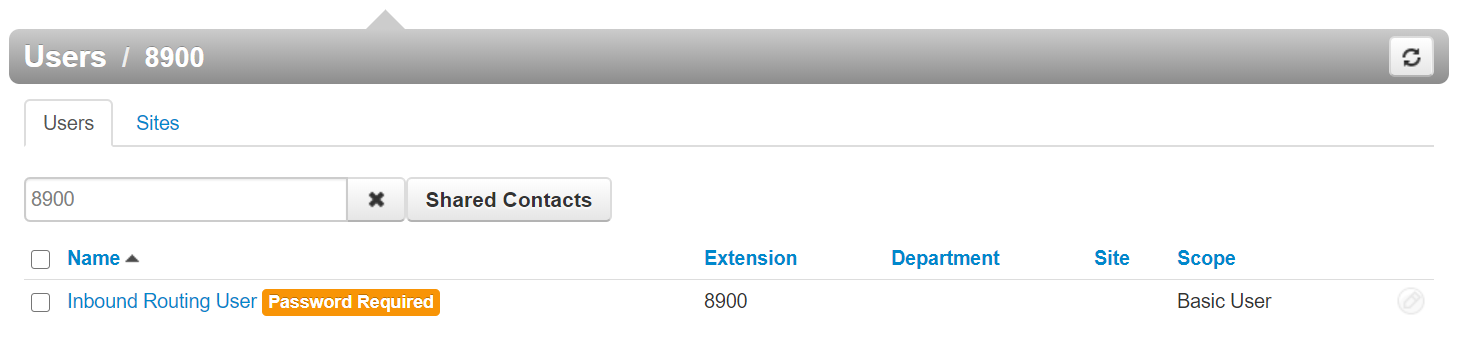
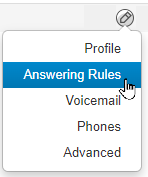
- Click the name of the routing user and visit the Answering Rules tab.
Quick Tip: Alternatively, click the Edit icon and select Answering Rules.
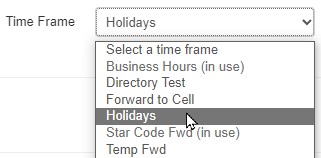
- If you need to add a new Time Frame Rule, click the Add Rule button.

- In the Add Rule window, use the Time Frame drop-down to select the new/updated Time Frame.
- If the rule should be active when the time frame is active, ensure the Enabled checkbox is selected.

- In the Call Forwarding section, select the Always checkbox and in the box, type the destination for calls during this time frame.
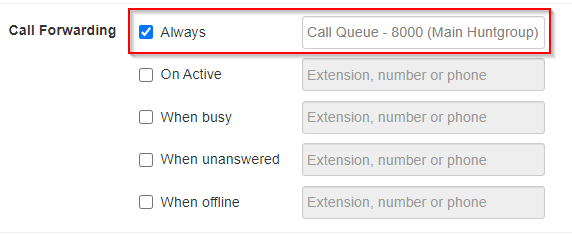
Quick Tip: Possible destinations include:
– Call Queues
– Auto Attendants
– Conference Bridges
– The Phone or Voicemailbox of a Specific User
– General Voicemailboxes
– An Off-Net 10-Digit Phone Number (Answering Service, Cellphone, etc.) - Click the Save button.

✔ You will then see the new rule for your new time frame listed.
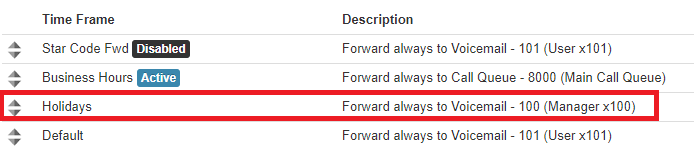
- Make sure that the Answering Rules are prioritized correctly.
- You can move Time Frames around by clicking and dragging the triangles on the left-hand side of the answering rules.

- The rules take priority from top-to-bottom.
- Top = Highest Priority (Usually a Temp Forward or Holiday answering rule)
- Bottom = Lowest Priority (Default/After Hours answering rule)
Quick Tip: The Default Answering Rule (listed at the bottom) is utilized as the After Hours.
It acts as a catch-all for any calls that come in when all of the Time Frames are inactive.
- You can move Time Frames around by clicking and dragging the triangles on the left-hand side of the answering rules.