Your View of the App
The app has two primary views: Condensed and Full Screen.
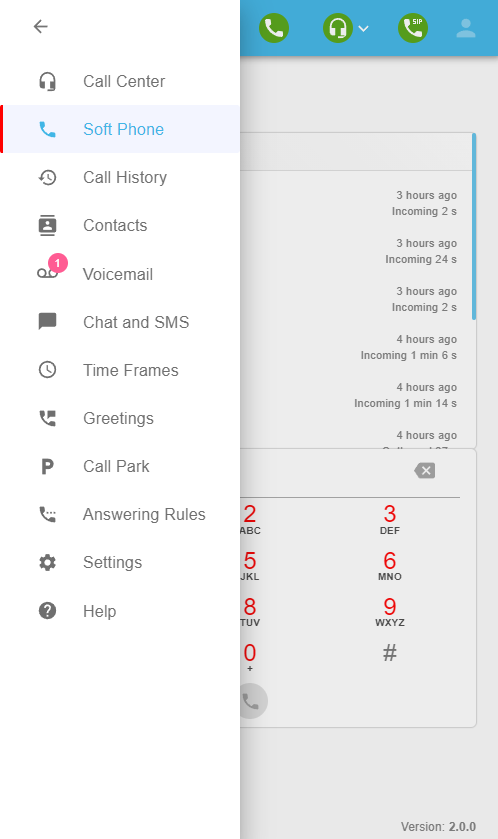
Condensed View
The condensed view looks similar to a smart phone app. The menu options are located in the top left hand corner of the window.
Full Screen View
The Full Screen view takes advantage of the longer width by stacking modules side by side. The menu can be left as always visible, or stowed away by clicking on the back arrow in the top left hand corner of the screen.
Collapsible Menu
The toolbar running down the left is expandable and collapsible. This toolbar is the key to navigating through the different features of the PrimecallVoIP app.
For both the Full Screen and Condensed views of the app, the toolbar is collapsible using two icons:
- Expand Toolbar -
- Collapse Toolbar -


Status Indicators

Registration Status
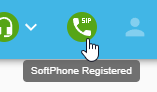
The Phone Icon with the word SIP in the top right hand corner is an indicator of your phone’s current registration status. Green is good and means your phone is registered. You should be able to make calls. Red is bad and means your phone is not registered. This could be due to a local internet issue or because you have not allowed the app to have access to your microphone. 
Active Calls
The Active Calls button can be used to view all active all for your user. This includes the desktop app, the mobile app, desk phone, or any other soft phone you may have.

Clicking on the button will bring you to a view of your active calls where you can see the FROM, TO and DIRECTION of the call (inbound, outbound). Also here are actions for Answering the call
Call Center Status
The Call Center Status button and drop-down can be used to set your status in the call queues you are present in.
To do this, use the Call Center Status drop-down to select a Status.
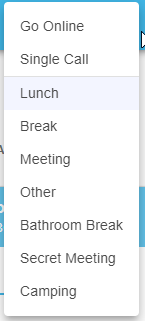
Note: Custom Statuses can be created by an Office Manager or Call Center Supervisor.
The color of the Call Center Status icon indicates your current status in the queue.
- Green - You are set as Online so that you can handle calls from your queue.
- Red - You are currently set as Offline.
- Grey - Your call center status is set as Other.
- Yellow -Your status is set as Lunch, Meeting, Break, etc.


Features of Your Desktop App
Use the Soft Phone Tab

In the Soft Phone page, you can use the Dial Pad to contact others and view your Recent Calls.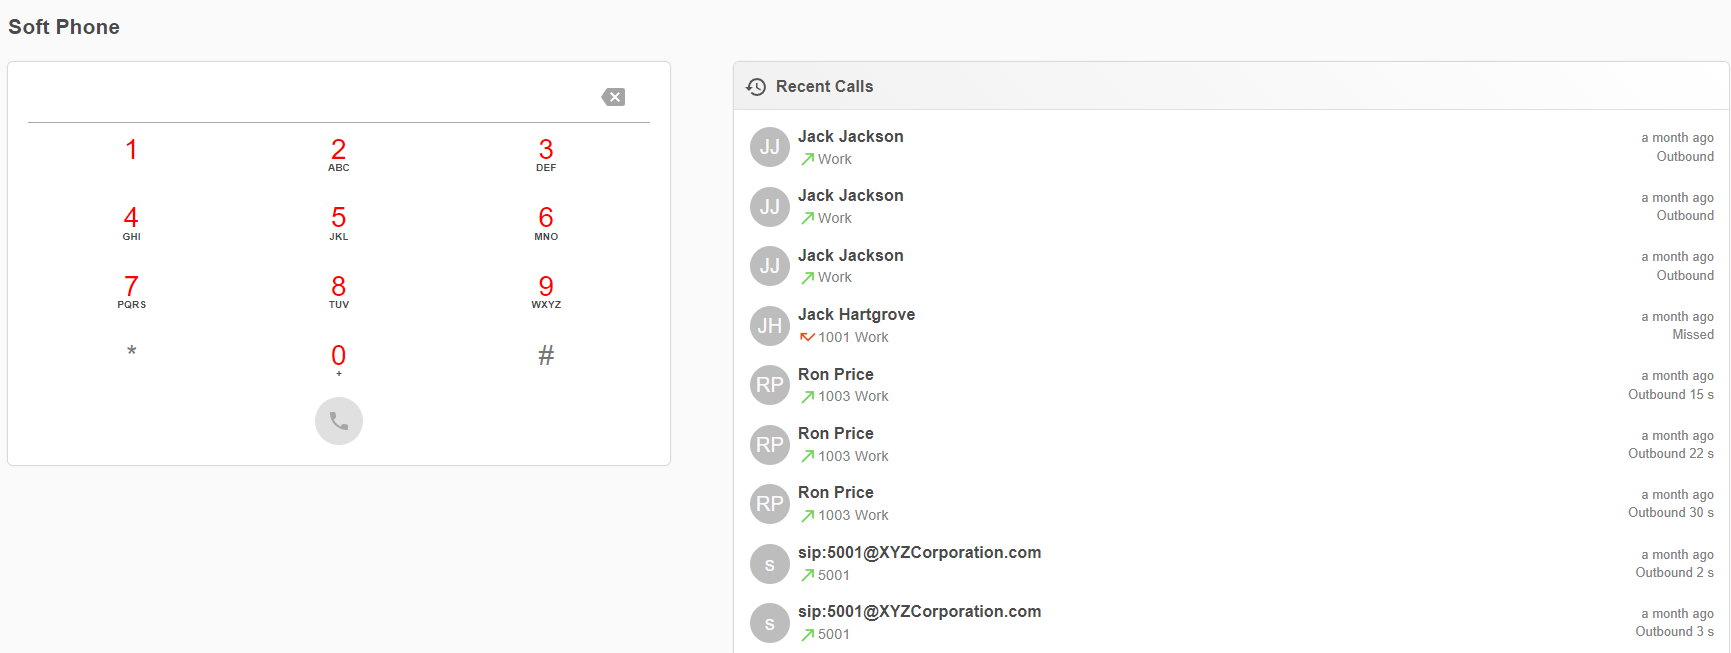
Place a Call
Just like with a desk phone or the mobile app, you can dial coworkers' extension numbers, external phone numbers, etc. using the dial pad feature.
There are three ways to place a call to someone using the Soft Phone page…
- Use your keyboard or mouse to dial the other person's phone number or extension number and press the Dial button.

- Use your keyboard to type in the name of a contact and click the contact shown in the Search section.

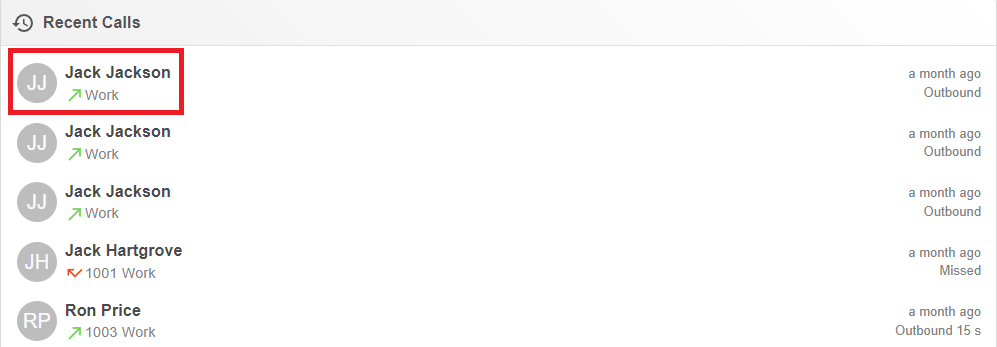
- Click on an entry in the Recent Calls section.
Receive a Call
When there is an incoming call, the Caller ID of the caller will be displayed alongside the Accept  , Ignore
  , and Decline
  buttons.
If you have enabled notification permissions, you can also get a notification from your computer that allows you to either Answer or Reject the call.
Active Calls
An Active Call will have a pop-up that offers different in-call features: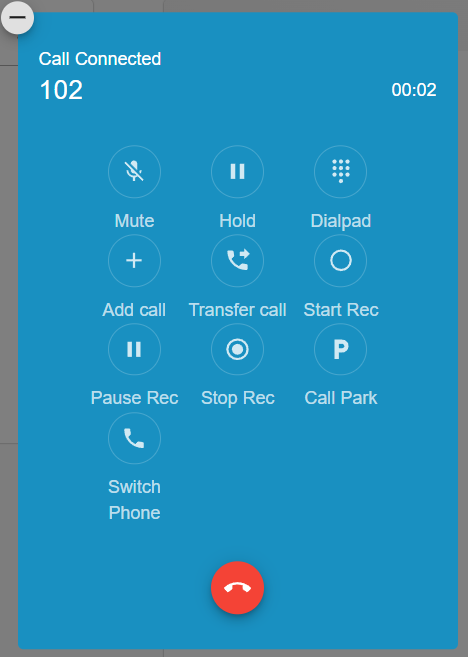
- Mute – Disables the microphone.
- Hold – Places the other party on hold.
- Dial Pad – Pulls up the DTMF dial pad so that digits can be entered during a call.
- Add Call – Enables you to create a second call that is separate from the first call. Once the second call is established the calls can be merged into a three-way conference or kept separate with the ability to swap between calls.
- Transfer Call - When clicked, you can select between doing a Blind Transfer or an Assisted Transfer.

- Blind Transfer - Do a blind transfer to send a call to another destination without speaking to the person taking the transfer.
- Assisted Transfer - Use an assisted transfer to speak with the person you want to transfer the call to before completing a transfer.
- Start Rec - If Call Recording is enabled,
- When clicked, a REC notice
 will appear above the duration of the call.
- When clicked, a REC notice
- Pause Rec - Allows you to pause your recording of the call.
- The REC notice will show a pause symbol:

Quick Tip: Click Resume Rec to continue recording the call.

- The REC notice will show a pause symbol:
- Stop Rec - Click this to stop recording a call.
- The REC notice
 will disappear:
- The REC notice
- Call Park - Select how to park a call.
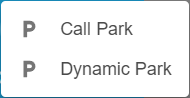
- Call Park - Click this to select which park queue the call should be transferred to.
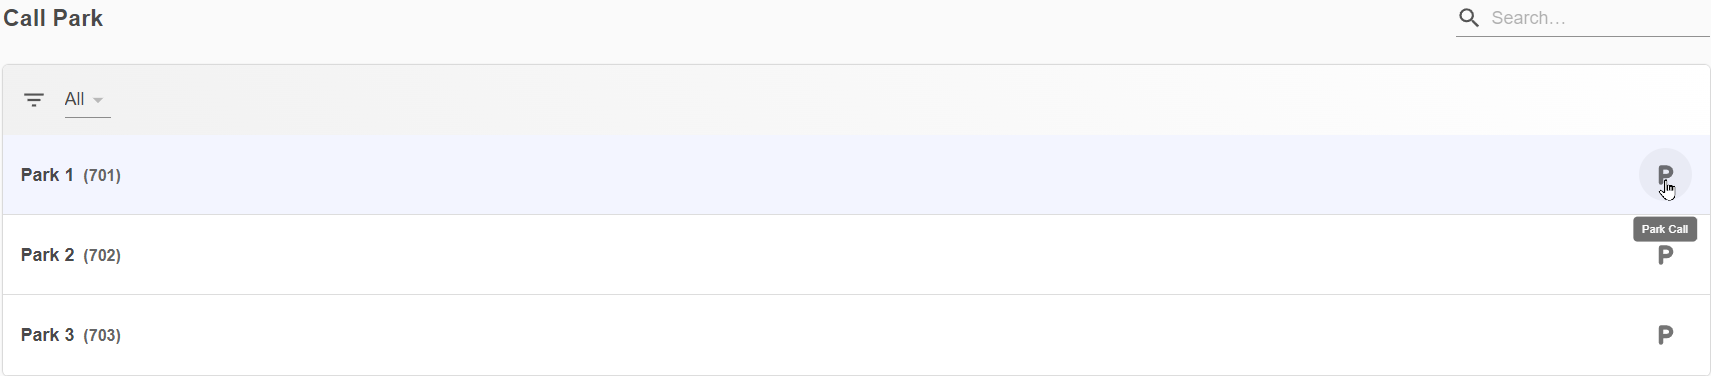
- Dynamic Park - Click this to have the app choose where to park the call for you.

- Call Park - Click this to select which park queue the call should be transferred to.
- Switch Phone - Move the active call to another one of your phones that is connect.
- Clicking this will show a list of connected phones to choose from.

- Clicking this will show a list of connected phones to choose from.
- Hide - Minimizes the active call options window.
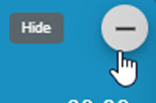
- The active call options can be brought back by clicking on the Back to Call button.
- The active call options can be brought back by clicking on the Back to Call button.

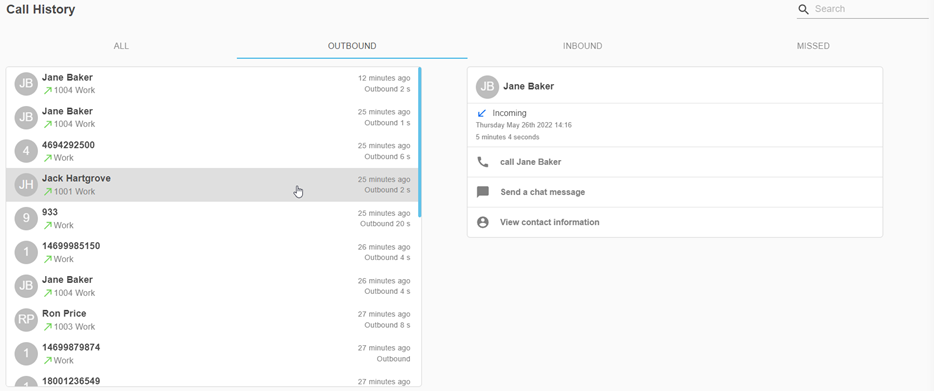
Reference Your Call History

The call history tab contains a complete call history for the user. This is organized by ALL, OUTBOUND, INBOUND, and MISSED calls.
You can select a call to find out more information about the call, such as the time, date, and duration. You can also choose to call the contact back, send them a message, or view their contact information.
Manage Contacts

The contacts section contains a list of all of your user’s Primecall contacts. While this is mainly for internal contacts, external contacts can also be added by clicking the ‘CREATE’ button.

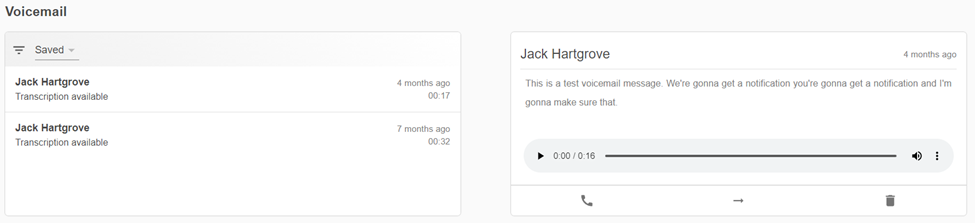
Check Your Voicemails

The voicemail section will display your user’s vociemails. There are two categories, New and Saved that can be switched using the drop down menu on the left.
Messages can be selected then listened to within the app. There are also call back and forward options, as well as a delete option.
Send Chats and SMS Messages

If you have any Chats from coworkers or any SMS messages, they will appear in the Chat and SMS page of the desktop app:

This interface allows you to not only send Chat and SMS message back and forth; it also allows you to insert a document, picture, use emojis, and even start a video call.
Note: If you do not have any Chats or SMS messages, then the modal will appear empty like so:
You can click the NEW button to start a new conversation. The New Conversation menu will appear to let you search for the recipient and type out a message:

DANGER: If SMS is being used, you must adhere to our Privacy Terms.
To learn more about enabling SMS, registering for a SMS Campaign, and the charges associated with SMS/MMS messaging, feel free to read this article regarding these recent guideline changes.
The interface for SMS messaging will look exactly the same as it does for the Chat feature.

Quick Tip: The messaging interface also has a scrollable list of certain features and settings that can be used and adjusted for the selected chat/SMS conversation:
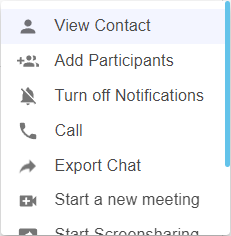
These options can be accessed by clicking the More Options  icon for a conversation.
Export Chat and SMS Messages
In some circumstances, it may be necessary to export a .CSV file of a conversation's messages.
To do this…
- Select and view the conversation.
- Click the More Options
 icon for the conversation.
- Select Export Chat.

- In the Export Chat Messages window, click the Calendar
 icons to set the date range for the messages to be pulled.
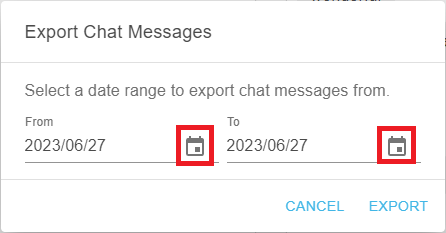
- Click EXPORT.
✔ A spreadsheet of the messages from that conversation from the date you chose should be downloaded to your PC.

- In order to open this spreadsheet, the file that downloaded will need to be extracted.
To extract the file…- Navigate to the Downloads folder of your PC.
- Right-click the zipped file.
- Select Extract All…
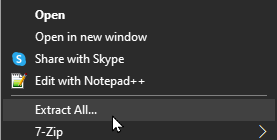
- Click the newly unzipped copy of the folder.
✔ Now you should be able to open the spreadsheet to view the messages.
Keep Your Desktop App Updated
Periodically, there may be updates available for the app. This will usually happen semi-automatically when the app is opened. Or a pop up may appear prompting the user to click ‘update’ to apply the update.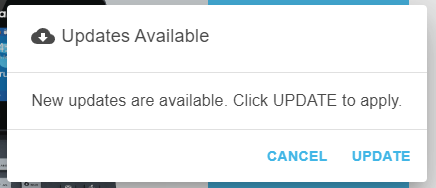
Alternatively, you can force a check for updates by clicking on the refresh icon in the top left of the app. Or Press Ctrl+F5 to refresh the app while it is in the foreground.