Scope: Office Managers and Site Managers will be able to adjust the Time Frames for their organization and all users.
Basic Users can only adjust their own Time Frames.
Create a Holiday Time Frame
- Navigate to the Time Frames page.

- Click on the name of your business (Domain Name) to pull up a list of the time frames for the whole business.

Quick Tip: Alternatively, you can search for and click on the name of a User that needs this routing just for themself.
- Click the Add Time Frame button to create a new holiday time frame.

- In the Add a Timeframe menu, fill in the following information:
- Name - Type in a unique name for this time frame, such as Holidays.

- When - Select Specific dates or ranges to schedule your holiday times in advance.

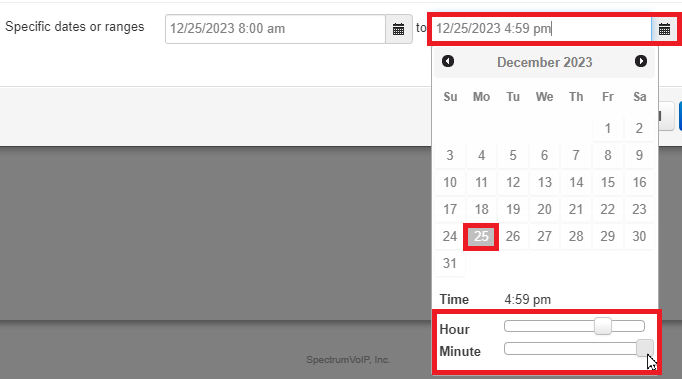
- Specific dates or ranges - Click the boxes or Calendar icons to select the date(s) and times the time frame will be active for.

- Name - Type in a unique name for this time frame, such as Holidays.
- To schedule more holiday dates, click the Add date range
 button and repeat step 4.
 - To remove a date range, click the Delete
 button.
 - Click the Save button.

Now, there your new, Holidays time frame should be included in your list of time frames, like so:

From here, you can use the Time Frame to set up routing/forwarding. To learn more, read this article.
Quick Tip: If you already have a holiday time frame created, you can add additional dates by clicking the name of the time frame and then clicking the Add date range
 button.
By doing this, you can efficiently use only one Holiday time frame for all of your Holidays to avoid cluttering up your domain's Answering Rules.