Troubleshoot Softphone Audio Issues on a Remote Desktop Session
Have you been experiencing issues using your audio devices while you are on a remote desktop session?
Many audio issues experienced on PCs can be due to issues with drivers or even the hardware itself.
Depending on how your remote desktop connection client or server is configured, audio issues while remotely connected to a PC or virtual machine may be a sign that your PC/server is not yet configured to share audio over remote connections.
WARNING: Some audio devices may not be compatible for use over a remote desktop connection.
Please refer to the documentation provided with your device to ensure your audio device is compatible.
Note: This article will explore troubleshooting audio issues on remote desktop sessions for Windows computers.
Test Your Audio Devices
In some cases, your audio devices may be having issues connecting due to hardware issues. To ensure your audio devices are working…
- Sign out of your remote desktop session.
- Open up the Softphone app or a Voice Recorder application on your own PC.
Test Your Audio in the PrimeCall Primecall App
If you have the PrimeCall Primecall app downloaded on your PC, you can test your audio using its Settings.
To do so…
1. Open and log into your PrimeCall Primecall Desktop App.
2. Navigate to the Settings tab.
3. On the Settings page, visit the Audio tab.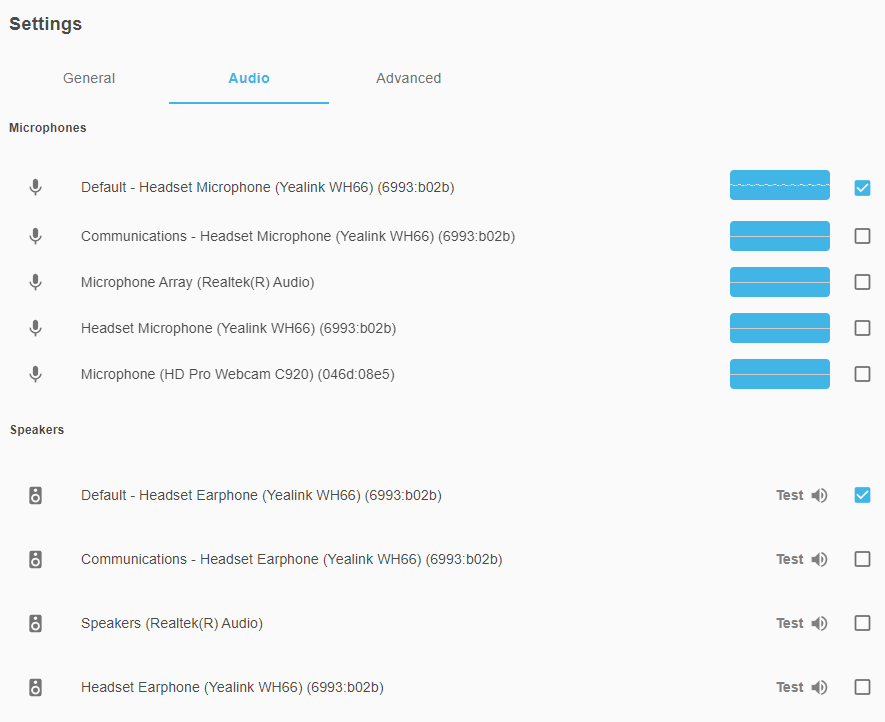
4. Use the Microphones section to ensure the app is picking up your audio.
5. In the Speakers section, click the Testoption to confirm your speakers play audio.
Test Your Audio in the PrimeCall ES App
If you have the PrimeCall ES app downloaded on your PC, you can test your audio by placing a test call to yourself.
To do so, call your own Direct Inward Dialing (DID) number, or call your main business number and have your call transferred to your extension.
On that call, confirm that you can hear yourself through both your phone and the softphone app.
Test Your Audio Using a Voice Recorder Application
Most PCs will have a Voice Recorded application that can be used for recording voice memos. We can use this application to record our microphone's audio and then play it back over our speakers.
To do this…
1. Search for and open a voice recorder or voice memo application on your PC.
2. Use the application's buttons to record a message.
3. Stop the recording.
4. Click a button or follow the application's instructions to play back the recorded message.
After testing your audio devices on your PC…
Update the Device's Drivers
If your audio devices are still not being recognized, there could be an issue with the drivers installed on your PC.
To check the status of your PC's drivers…
- Using the search box on your PC's taskbar, search for and select Device Manager.
- Confirm the drivers for your audio devices are showing correctly.
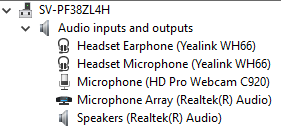
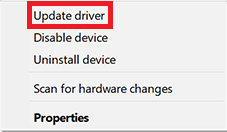
- Right-click a driver and select Update driver.
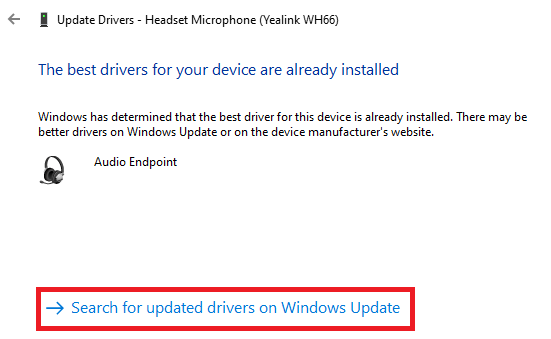
- Click Search automatically for drivers.
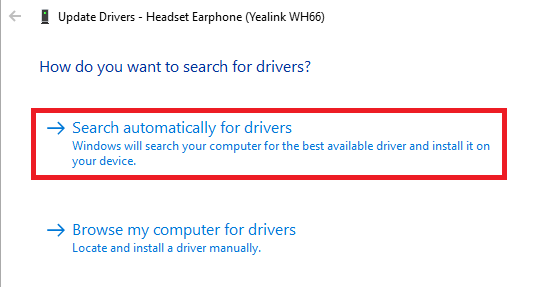
- If the best driver for the audio device is already installed, follow the prompt and click Search for updated drivers on Windows Update.
- Click the Check for updates button.
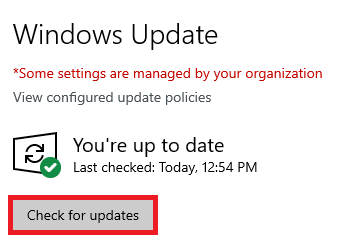
After checking for updates…
Reinstall the Device's Driver
- In Device Manager, right-click the name of the device and select Uninstall device.
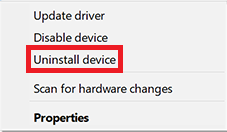
- Restart your PC.
✔ Your PC will attempt to reinstall your device.
- Retest your audio using your softphone app or your PC's voice recorded application.
- If your audio devices are still not recording or playing audio, continue to the next section.
Restart Your PC, USB Hub or Dock, and Audio Devices
If your drivers are updated and your audio devices are still not being recognized, restart your PC as doing a power cycle can help resolve issues with devices connecting.
If your audio devices have their own power supply or are plugged into a USB hub/dock, unplug your audio devices or USB hub/dock from the power and then plug them back in.
Once you have restarted your PC, audio devices, and/or USB hub/dock, retest your audio to see if your audio devices can now record and play audio on your PC.
Configure Your RDP Client's Remote Audio Settings
If your softphone application is not detecting your microphone input or audio output, the first thing to check is your RDP client's remote audio settings.
Note: This step-by-step will reference the Remote Desktop Connection application for Windows computers.
To ensure your RDP client is sharing audio properly…
- Open your RDP client.

- In the Remote Desktop Connection window, click Show Options to access the advanced settings menu.
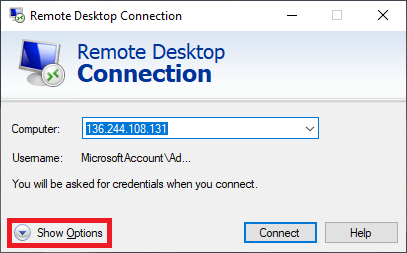
- Navigate to the Local Resources tab and open remote audio settings.
- In the Remote audio section, click the Settings… button.
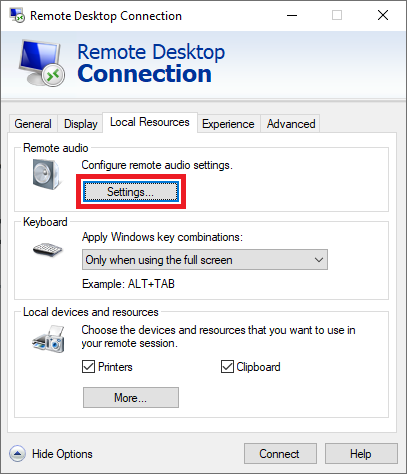
- In the Remote audio playback section, ensure Play on this computer is selected.

- In the Remote audio recording section, select Record from this computer.

- Click the OK button.

✔ The remote PC's audio devices should now be available to use in your softphone app.
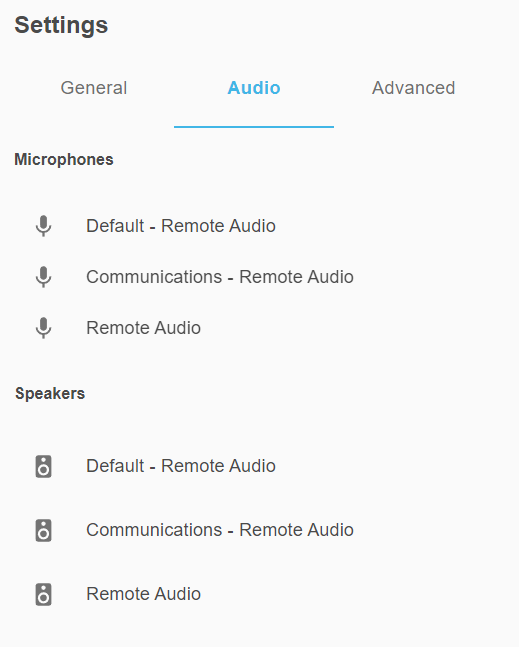
If these audio devices are still not showing up, continue to the next section.
Restart the Remote Desktop Session
If you are remotely connected to another computer or a virtual machine and your RDP client's audio settings are configured correctly, then restarting your remote desktop session may help resolve any issues with audio devices.
To do this, sign out of the remote desktop session instead of only closing the remote session. Restart and log back into the remote desktop session.
Ensure Your Server Allows Remote Desktop Services
WARNING: If you currently have an IT team or a Managed Service Provider (MSP) that manages your PCs and servers, it is recommended to contact them regarding any issues with your server's configuration.
- Open Server Manager.
- In the Configure this local server section of the QUICK START tab, select Add roles and features.

- In the Add Roles and Features Wizard window, visit the Server Roles tab.
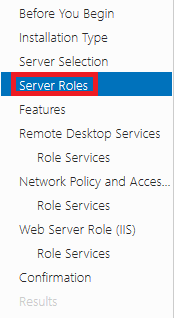
- In the Select server roles menu, find and select Remote Desktop Services.
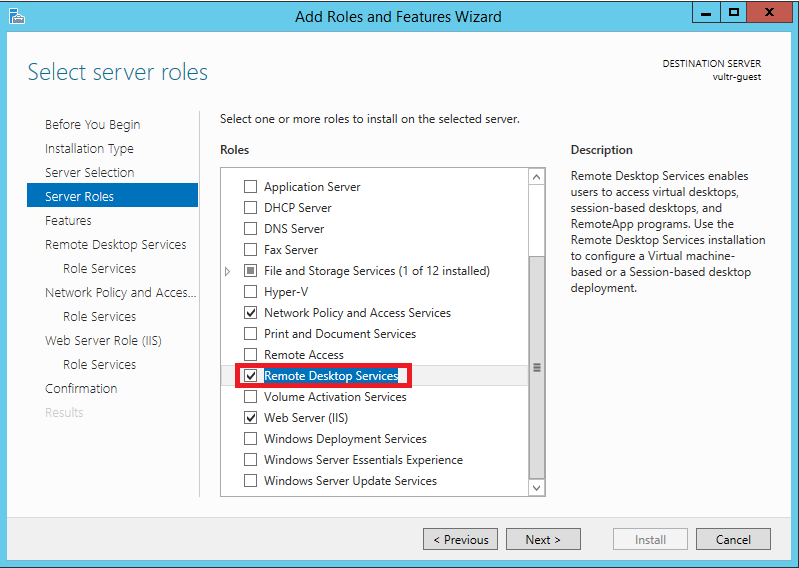
- Click the Next > button 3 times.

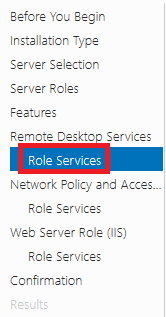
- Visit the Role Services tab.
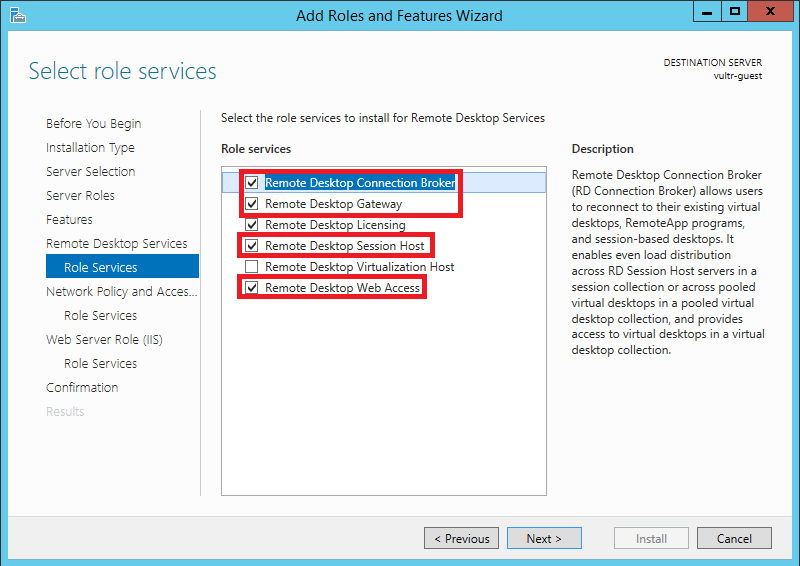
- In the Select role services menu, select Remote Desktop Connection Broker, Remote Desktop Gateway, Remote Desktop Session Host, and Remote Desktop Web Access.
- Click the Next > button until you can click the Install button.
- After installation, restart your server.
WARNING: Restarting a server can bring down the remote desktop connections of other users in your organization.
It is recommended to coordinate a time to restart your server so that no one experiences any interruptions while working.
Enable the Windows Audio Service
If the sound icon on your taskbar still displays a red cross…
- Right-click the sound icon.
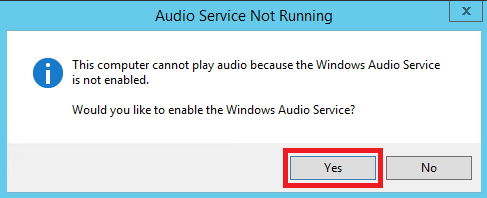
- On the Audio Service Not Running notification, click Yes.
✔ You should now be able to use your local audio and microphone devices on the softphone while using Remote Desktop Connection.
NOTE: If you have any issues configuring your RDP client's audio settings, reach out to your IT team or the Managed Service Provider that manages your PCs and server.
These specialists can help configure any settings in your RDP client and server.