Overview
This article provides a detailed overview of the new Messages section of our updated Music on Hold (MoH) page available in the Portal from the PrimecallV43 update.
A couple of these improvements include a new Messages Section, an updated User Interface (UI) for our Music on Hold feature, and the ability to control more of how these messages and music are played (e.g., randomize music and time between messages).
For example, while a customer is on hold, the music can now be briefly interrupted with a message. One kind of message commonly used is called a “comfort message”, which can sound like this: "Your call is important to us. Please wait on the line and an agent will be with you shortly."
Layout

Note: There are important differences between the MOH screen at the domain level and the MOH screen when editing a call queue, as described briefly here and in more detail throughout the Music on Hold article detailing the latest update to v43.
In both screens music and messages can be added, copied, downloaded, removed, and rearranged.
Domain MOH
At the domain level, music on hold is accessed by first clicking on the Music On Hold tab in the top menu. Here is where music on hold can be toggled "yes" (enable) and "no" (disable).

Call Queue MOH
The MOH screen is also accessed by editing a specific call queue.
Click on the MOH icon across from a call queue. This is the screen that enables "randomize music" as well as the ability to configure the time between messages.

Managing Messages
Office Managers can use the Music on Hold section to add in and modify messages and announcements for callers waiting on hold for the whole business or certain users and call queues. These modifications that can be made are copying messages, re-ordering messages, adjusting the time between messages, and more.
Add a Message
To add in a message for callers to listen to while waiting on-hold…
- Click the Add Message button.

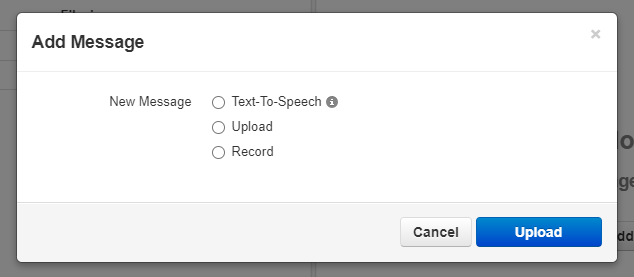
✔ Doing so will pull up the Add Message modal.

- Use either of these options to add in a Message:
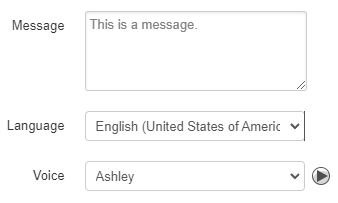
- Text-to-Speech: Use the text-to-speech option to type in a message and select an automated voice that will read out what is typed. Once the message has been typed out, click the Save button.

- Upload: Using the upload option, you can upload a converted audio file and give the message a name. Once the file has been selected on your PC, click the Upload button.

- Record: The record option allows you to type in the phone number or extension number for the phone system to send a call. Click the Call button to send a call to the number. When the call is answered, it will record whatever is said to it.

✔ You should now see the new Message added into the Messages section.

- Wait Status Updates: This message will calculate and announce the estimated wait time and/or current queue position for the caller.

NOTE: This type of Message is only available for call queues to use.
- Text-to-Speech: Use the text-to-speech option to type in a message and select an automated voice that will read out what is typed. Once the message has been typed out, click the Save button.
Add an Introduction Message
Similarly to a regular message, an Introduction Message can be added in. The introduction message is played before any of the music or messages play. This kind of message is useful for notices or warnings, such as that the call may be recorded.
To add in an Introduction Message…
- Click the Add Intro Message icon
 .
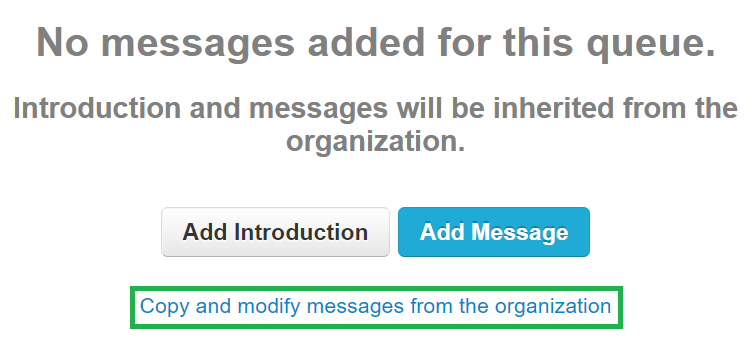
. Quick Tip: If there have not been any messages added, you can click the Add Introduction button on the notice that shows in the Messages section.

- Use either of these options to add in an Introduction Message:
- Text-to-Speech: Use the text-to-speech option to type in a message and select an automated voice that will read out what is typed. Once the message has been typed out, click the Save button.

- Upload: Using the upload option, you can upload a converted audio file and give the intro message a name. Once the file has been selected on your PC, click the Upload button.

- Record: The record option allows you to type in the phone number or extension number for the phone system to send a call. Click the Call button to send a call to the number. When the call is answered, it will record whatever is said to it.

✔ You should now see the new Introduction Message added into the Messages section.

- Text-to-Speech: Use the text-to-speech option to type in a message and select an automated voice that will read out what is typed. Once the message has been typed out, click the Save button.
Customize your Music and Messages
Re-Order Messages
Once messages and music have been added in, the lists of music and messages can be re-ordered to prioritize when those songs/messages should play.

✔ Once the music or messages have been re-ordered, click the Save button that appears in the warning banner.
Rename a Message
To rename a message, click the Edit Name icon  next to it.

Delete a Message
To delete an unnecessary message, click the Delete icon  next to it.

Copy an Existing Message
Copy an existing message or song by clicking on the Copy icon  .
.
✔ Clicking Copy will add the same message/song to the bottom of the list with "Copy" appended to the name.
Time Between Messages
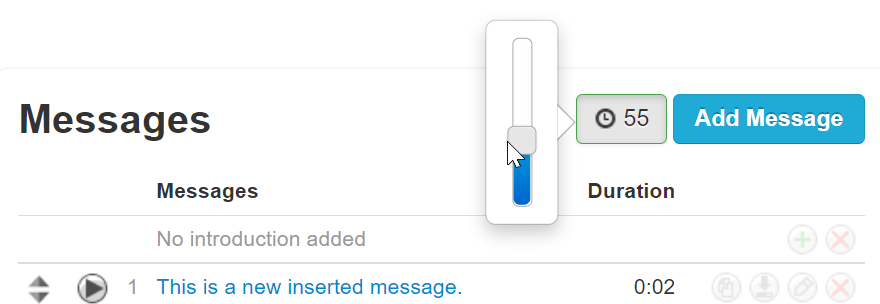
The Time Between Messages feature sets the time between the end of one message and the start of the next one. Within each of these breaks, the music will resume.
This can be adjusted with a slider in increments of 5 seconds. The default value for the time between messages is 30 seconds, but this value can range from 15 to 120 seconds.
Copy and Modify Music from the Organization

To make selecting a user's MOH (Music on Hold) easier, the Copy and Modify Music from the Organization feature allows users to take the music/messages from the domain level and copy them onto a user. From there, the user's music/messages inherited from the domain can be edited and deleted to fit the user's needs.
To do this…
- Search the user or call queue that will need this adjustment.

- Click the Copy and Modify Music from the Organization hyperlink.

- Once this hyperlink is clicked, the selected section will update to list out the audio used by the domain.

- If needed, edit the name of an audio file using the Edit
 button or delete a message using the Delete
  button
